티스토리 뷰
0. FullCalendar 공식 문서
Documentation | FullCalendar
fullcalendar.io
1. Angular Project 생성
$ ng new 프로젝트명
$ cd 프로젝트명
$ ng serve
먼저 angular 프로젝트를 생성한다. 기본 설정으로 하고 스타일 시트는 css를 사용했다. 프로젝트 생성 후 ng serve 명령으로 프로젝트를 실행해 정상적으로 생성이 되었는지 확인 후 vscode 또는 webstorm을 통해 해당 프로젝트를 연다.
2. full calendar package 설치
$ npm install --save @fullcalendar/angular @fullcalendar/core @fullcalendar/daygrid프로젝트에서 사용할 package를 npm 명령을 통해 설치한다. 이후 추가할 플러그인이 생기면 npm install --save 다음에 package 이름을 적어 설치하면 된다. 이후 package.json에 추가되었는지 확인한다.
3. FullCalendarModule 추가
import { FullCalendarModule } from '@fullcalendar/angular'; // for FullCalendar!다음으로 app.module.ts에 FullCalendarModule을 추가해준다. app 전체에서 FullCalendar를 사용할 수 있도록 해준다.
4. style.css에 스타일 추가
@import '~@fullcalendar/core/main.css';
@import '~@fullcalendar/daygrid/main.css';
프로젝트의 글로벌 시트에 fullcalendar에서 제공하는 스타일을 추가해준다.
5. component 구현
import { Component, ViewChild } from '@angular/core';
import { FullCalendarComponent } from '@fullcalendar/angular';
import { EventInput } from '@fullcalendar/core';
import dayGridPlugin from '@fullcalendar/daygrid';
import interactionPlugin from '@fullcalendar/interaction'; // for dateClick

@Component({
  selector: 'app-root',
  templateUrl: './app.component.html',
  styleUrls: ['./app.component.css']
})
export class AppComponent {
  @ViewChild('calendar') calendarComponent: FullCalendarComponent; // the #calendar in the template

  // calendar 설정 => 템플릿과 연결
  calendarVisible = true;
  calendarPlugins = [dayGridPlugin, interactionPlugin];
  calendarWeekends = true;
  calendarEvents: EventInput[] = [
    { title: 'Event Now', start: new Date() }
  ];

  // 날짜를 클릭할 경우 호출
  handleDateClick(arg) {
    if (confirm('Would you like to add an event to ' + arg.dateStr + ' ?')) {
      this.calendarEvents = this.calendarEvents.concat({ // add new event data. must create new array
        title: 'New Event',
        start: arg.date,
        allDay: arg.allDay
      });
    }
  }
}
6. 템플릿 구현
<div class='app-calendar' *ngIf="calendarVisible">
  <full-calendar
    #calendar
    defaultView="dayGridMonth"
    [header]="{
        left: 'prev,next today',
        center: 'title',
        right: 'dayGridMonth,timeGridWeek,timeGridDay,listWeek'
      }"
    [plugins]="calendarPlugins"
    [weekends]="calendarWeekends"
    [events]="calendarEvents"
    (dateClick)="handleDateClick($event)"
  ></full-calendar>
</div>
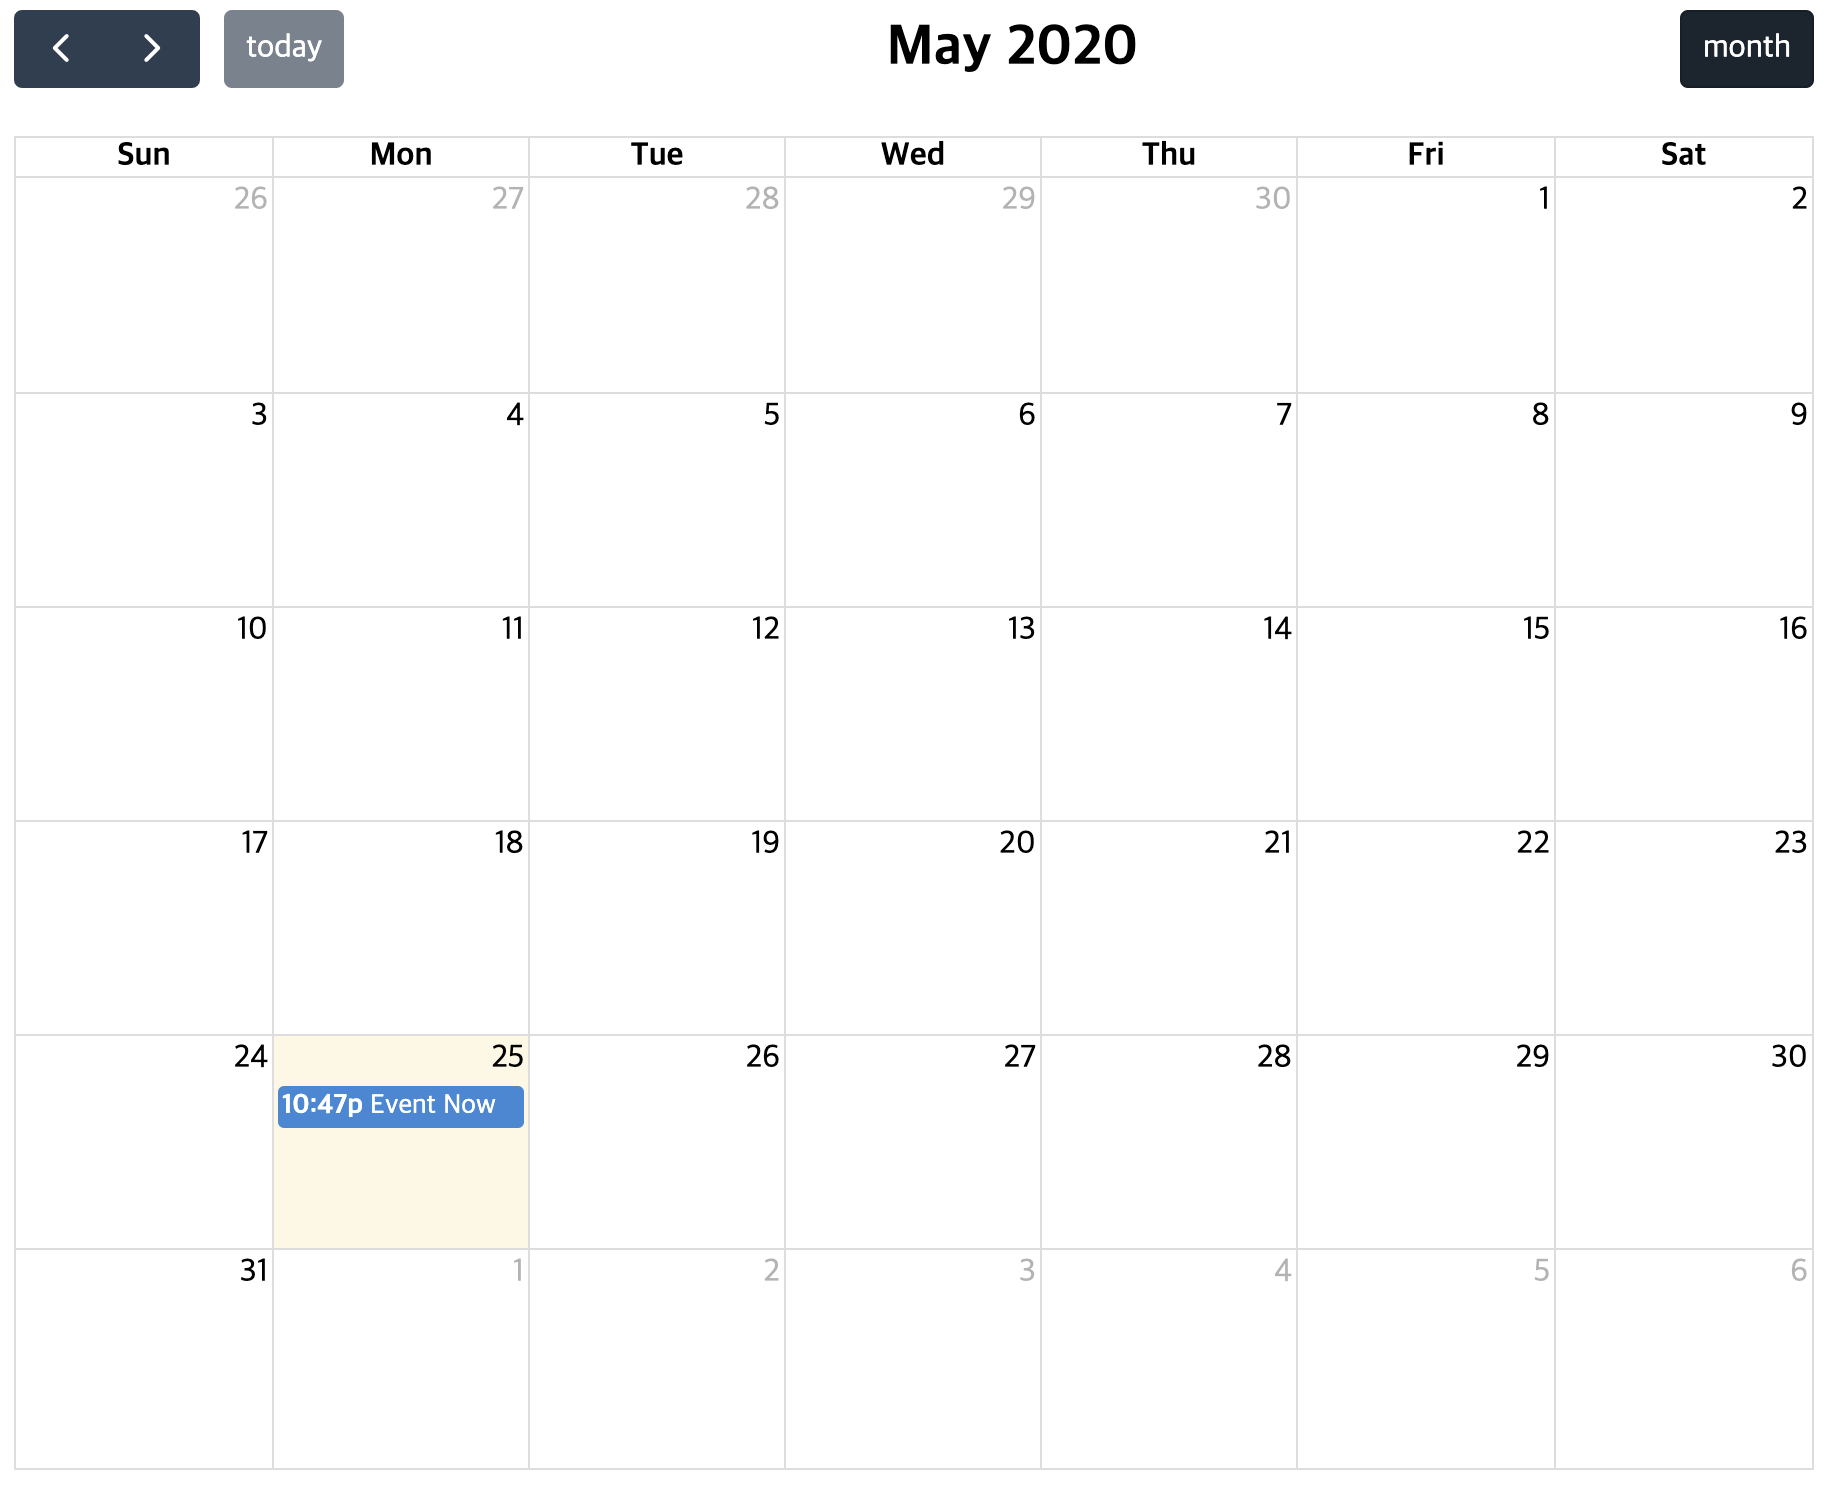
defaultView는 처음 어떤 뷰를 보여줄 것인가에 대한 설정으로 dayGridMonth의 경우 달(Month)를 기준으로한 화면을 출력해준다. header 속성은 달력 상단에 표시할 내용을 정의하는 것으로 왼쪽에 '이전,다음' 이동 버튼, '오늘'로 이동하는 버튼을 추가하고 중앙에는 해당달의 이름 및 년도를 표시한다. 오른쪽에는 다른 뷰를 볼 수 있는 버튼을 추가한다.
plugins는 해당 달력 컴포넌트에서 사용할 플러그인을 추가해준다. weekends 속성은 주말을 표시할지 말지에 대한 설정이다.
events 속성은 달력에 표시될 이벤트를 설정하는 속성으로 이벤트 EventInput 타입의 배열을 값으로 가진다.
dateClick 이벤트가 발생하면 handleDateClick이라는 함수가 실행되고 event 객체를 매개변수로 넘기면 클릭한 날짜 데이터에 접근할 수 있다.


7. 추가 기능 구현
- 이벤트 클릭 시 수정, 삭제 기능
(eventClick)="handleEventClick($event)"handleEventClick(arg) {
const val = prompt('이벤트의 제목을 수정하세요! (이벤트를 삭제하고 싶은 경우 "delete"라고 입력하세요!)');
if (val) {
if ('delete' === val) { // delete
const index = this.calendarEvents.findIndex(e => e.id === arg.event.id);
if (index > -1) {
this.calendarEvents.splice(index, 1);
}
arg.event.remove();
} else { // update
const temp = this.calendarEvents.find(e => e.id === arg.event.id);
temp.title = val;
arg.event.setProp('title', val);
}
}
console.log(val);
}eventClick 이벤트를 통해 달력 내 이벤트를 클릭한 경우 handleEventClick() 함수를 실행한다. 함수가 실행되면 prompt 창이 실행되고 입력 값이 delete인 경우 calendarEvents 배열에서 클릭한 이벤트와 같은 이벤트를 찾아서(event의 id를 비교해서) 삭제하고 바로 적용을 위해 클릭한 이벤트를 삭제(arg.event.remove())한다.
그외 입력값의 경우 calendarEvents 배열에서 클릭한 이벤트와 같은 이벤트를 찾아서(event의 id를 비교해서) title을 변경하고 바로 적용을 위해 클릭한 이벤트의 title 값을 변경(arg.event.setProp())한다.


- 이벤트 드래그해서 이동
[editable]="true"
(eventDrop)="handleEventDrop($event)"
handleEventDrop(arg) {
const newEvent = arg.event;
const oldEvent = arg.oldEvent;
const temp = this.calendarEvents.find(e => e.id === oldEvent.id);
temp.start = newEvent.start;
temp.end = newEvent.end;
}이벤트를 드래그해서 이동하고 싶은 경우 editable 속성을 true로 설정해준다. 또한 이벤트 드래그 이후 이전 Event 객체와 새로 옮겨진 Event 객체를 같이 얻고 싶은 경우 eventDrop 이벤트를 정의해서 사용한다.
- 여러 날짜 선택
[selectable]="true"
(select)="handleDateSelect($event)"
// 한 날짜를 클릭한 경우
handleDateClick(arg) {
if (confirm('Would you like to add an event to ' + arg.startStr + ' ?')) {
this.calendarEvents = this.calendarEvents.concat({ // add new event data. must create new array
title: 'New Event',
// start: arg.date,
start: arg.start,
allDay: arg.allDay,
id: String(Math.random())
});
}
}
// 날짜를 선택한 경우
handleDateSelect(arg) {
// 날짜 차이 구하기
const diff = (arg.end.getTime() - arg.start.getTime()) / (1000 * 60 * 60 * 24);
if (diff <= 1) {
this.handleDateClick(arg);
} else { // 여러 날짜를 선택한 경우
if (confirm('Would you like to add an event ' + arg.startStr + ' to ' + arg.endStr + '?')) {
this.calendarEvents = this.calendarEvents.concat({ // add new event data. must create new array
title: 'New Event',
start: arg.start,
end: arg.end,
allDay: arg.allDay,
id: String(Math.random())
});
}
}
}여러 날짜를 같이 선택하고 싶은 경우 selectable 속성을 true로 한다. 날짜 선택 이후 처리는 select 이벤트에 정의해준다.
8. 결과
https://github.com/hanbee1005/angular-fullcalendar
hanbee1005/angular-fullcalendar
Contribute to hanbee1005/angular-fullcalendar development by creating an account on GitHub.
github.com
- Total
- Today
- Yesterday
- cloudfront
- 순열
- search
- permutation
- Algorithm
- SWIFT
- DFS
- 에라토스테네스의 체
- spring
- EC2
- Dynamic Programming
- ECR
- CodeCommit
- programmers
- 조합
- array
- sort
- 소수
- ionic
- BFS
- Combination
- java
- CodePipeline
- AWS
- 프로그래머스
- 수학
- map
- string
- CodeDeploy
- Baekjoon
| 일 | 월 | 화 | 수 | 목 | 금 | 토 |
|---|---|---|---|---|---|---|
| 1 | 2 | 3 | 4 | 5 | 6 | 7 |
| 8 | 9 | 10 | 11 | 12 | 13 | 14 |
| 15 | 16 | 17 | 18 | 19 | 20 | 21 |
| 22 | 23 | 24 | 25 | 26 | 27 | 28 |
