티스토리 뷰
0. 개발 환경
$ node -v
v12.16.0

$ npm -v
6.13.4

$ ionic -v
6.1.0

$ cordova -v
9.0.0 (cordova-lib@9.0.1)
1. 프로젝트 생성
$ ionic start 프로젝트명 blank2. QR Code Scan을 위한 플러그인 설치
$ ionic cordova plugin add cordova-plugin-qrscanner
$ npm install @ionic-native/qr-scanner
3. app.module.ts에 플러그인 추가
...
import { QRScanner } from '@ionic-native/qr-scanner/ngx';

@NgModule({
  ...
  providers: [
    ...
    QRScanner,
    ...
  ],
  bootstrap: [AppComponent]
})
export class AppModule {}
4. 기본 화면 구성
<ion-header [translucent]="true">
  <ion-toolbar>
    <ion-title>
      Blank
    </ion-title>
  </ion-toolbar>
</ion-header>

<ion-content [fullscreen]="true">
  <div id="container">
    <ion-button expand="block" (click)="goToQRCodeScan()">
      <ion-icon name="qr-code-outline"></ion-icon>QR Code Scan
    </ion-button>
  </div>
</ion-content>
기본 화면인 home page는 QRCodeScan을 위한 페이지로 넘어가기 위해 버튼 하나만 추가하였다.
import { Component } from '@angular/core';

import { NavController } from '@ionic/angular';

@Component({
  selector: 'app-home',
  templateUrl: 'home.page.html',
  styleUrls: ['home.page.scss'],
})
export class HomePage {

  constructor(private navController: NavController) {}

  goToQRCodeScan() {
    this.navController.navigateForward('qr-code-scan');
  }
}
버튼을 클릭하면 NavController를 통해 qr-code-scan 페이지로 이동하게 된다.

5. QR Code Scan 기능 구현
<ion-header>
  <ion-navbar>
    <ion-title>QR Scan</ion-title>
  </ion-navbar>
</ion-header>

<ion-content no-bounce>
  <div id="preview" [class]="contentClass">
    <ion-img src="assets/imgs/qrscanner.png"></ion-img>
  </div>
</ion-content>
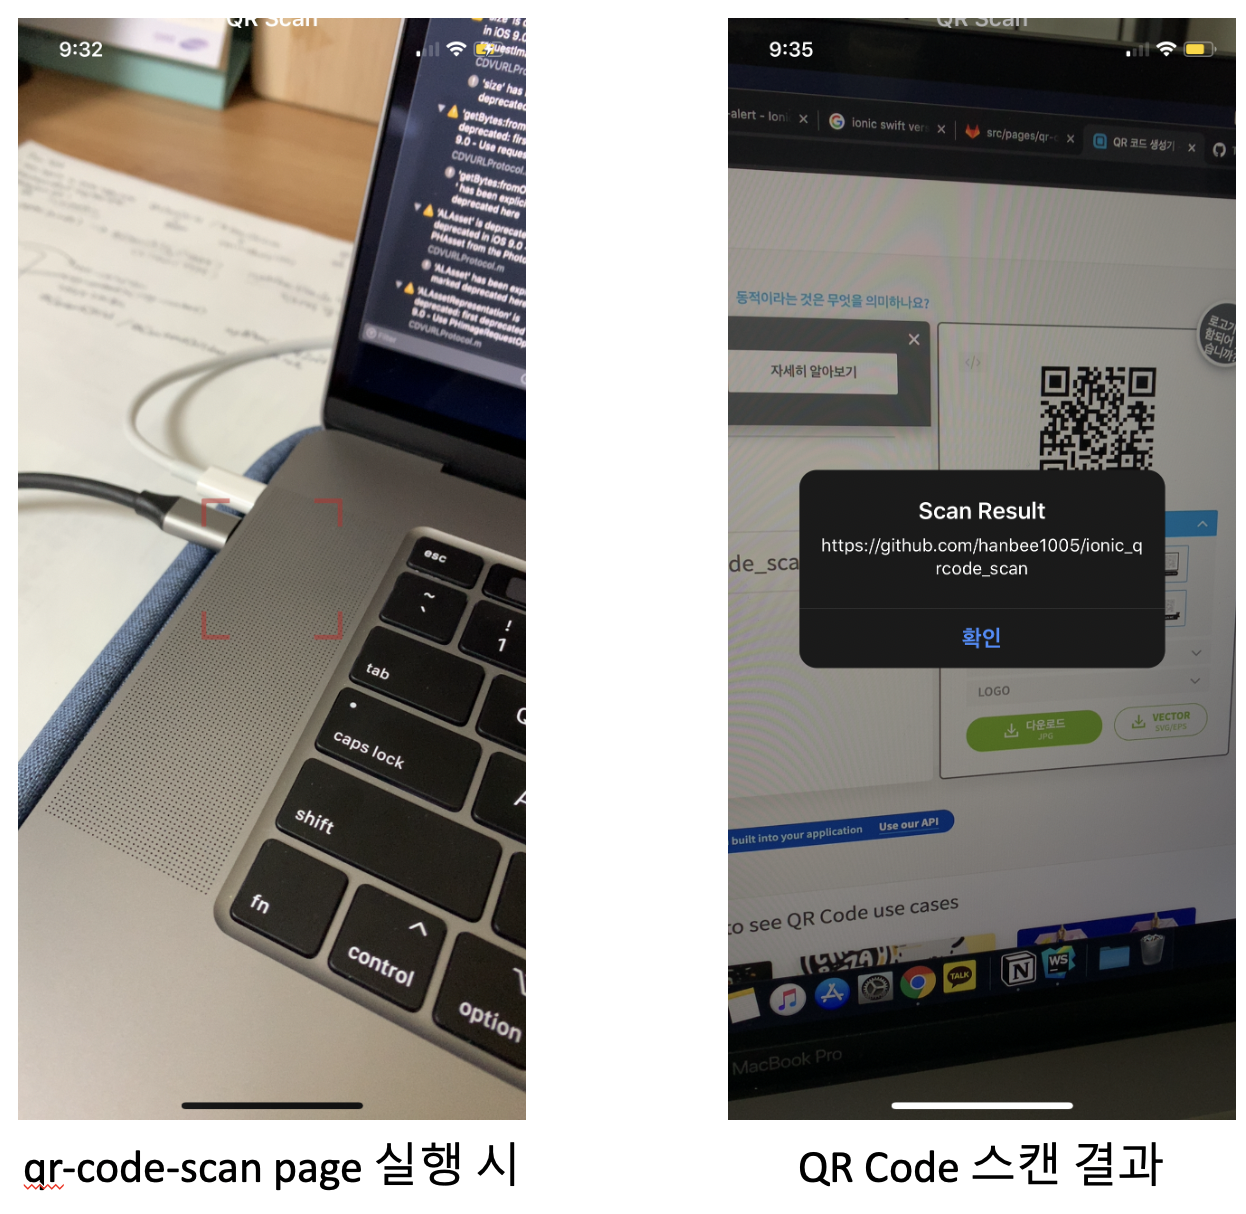
qr-code-scan page의 화면은 투명 배경에 빨간 스캐너 가이드를 추가했다. 'assets/imgs/qrscanner.png'는 빨간 사각형 가이드 이미지이다. 해당 이미지를 잘 표현하고 qr-code-scan page의 배경을 투명하게 하기 위한 css 설정은 아래와 같다.
ion-content div {
  background-color: #FFF;
  height: 100%;
  width: 100%;
}

ion-content div.background-color-transparent {
  background-color: transparent;
  background-size: cover;
  -webkit-background-size: cover;
}

ion-content {
  --ion-background-color: transprent;
  --overflow: hidden;
}

ion-img {
  opacity: 0.5;
  max-width: 95%;
  max-height: calc(98% - 100px);
  position: fixed;
  top: 50%;
  left: 50%;
  /* bring your own prefixes */
  transform: translate(-50%, -50%);
}
qr-code-scan page의 ts 파일은 다음과 같다.
import { Component, OnInit } from '@angular/core';

import { Platform, AlertController, NavController } from '@ionic/angular';
import { QRScanner, QRScannerStatus } from '@ionic-native/qr-scanner/ngx';

@Component({
  selector: 'app-qr-code-scan',
  templateUrl: './qr-code-scan.page.html',
  styleUrls: ['./qr-code-scan.page.scss'],
})
export class QrCodeScanPage implements OnInit {

  scanSub;

  private contentClass = '';

  constructor(private platform: Platform,
              private alertController: AlertController,
              private navController: NavController,
              private qrScanner: QRScanner) { }

  ngOnInit() {
    this.platform.ready().then(() => {
      this.openScanner();
    });
  }

  ionViewDidEnter() {
    this.showCamera();
  }

  ionViewWillLeave() {
    this.closeScanner();
  }


  showCamera() { // 배경 투명하게 전환
    this.contentClass = 'background-color-transparent';
  }

  hideCamera() {
    this.contentClass = '';
  }

  openScanner() {
    this.qrScanner.prepare().then((status: QRScannerStatus) => {
      if (status.authorized) {
        this.scanSub = this.qrScanner.scan().subscribe((text: string) => {
          console.log('Scanned something', text);

          this.scanned(text); // 스캔한 이후 값을 전달
        });

        this.qrScanner.resumePreview();
        this.showCamera();
        this.qrScanner.show();

      } else if (status.denied) {
            // camera permission was permanently denied
            // you must use QRScanner.openSettings() method to guide the user to the settings page
            // then they can grant the permission from there
      } else {
            // permission was denied, but not permanently. You can ask for permission again at a later time.
      }
    }).catch(async (e: any) => {
      console.log('Error is', e);

      // 카메라 권한이 없는 경우
      if (e.code === 1) {
        const alert = await this.alertController.create({
          header: 'Camera Permission',
          message: 'QR 스캔을 위한 카메라 권한이 거부되었습니다. 설정에서 허용해 주세요.',
          buttons: [{
            text: '확인',
            handler: () => {
              this.navController.navigateBack('home'); // home 화면으로 이동
              this.qrScanner.openSettings();           // 스마트폰 설정 앱 열기
            }
          }]
        });

        await alert.present();
      }
    });
  }

  // Scanner 닫기 (카메라 숨기기 등)
  closeScanner() {
    if (this.scanSub) {
      this.scanSub.unsubscribe(); // stop scanning
    }
    this.scanSub = null;
    this.hideCamera();

    this.qrScanner.hide(); // hide camera preview
    this.qrScanner.destroy();
  }

  // Scan 한 이후 값을 받아서 처리
  async scanned(data: any) {
    const alert = await this.alertController.create({
      header: 'Scan Result',
      message: data,
      buttons: [{
        text: '확인',
        handler: () => {
          this.navController.navigateBack('home');
        }
      }]
    });

    await alert.present();
  }
}
QR code scanner는 카메라 모듈을 이용한다. 카메라 모듈을 이용하기 위해 필요한 시점에 사용자에게 권한 요청을 한다. 권한을 허용하고 QR Code Scan 하고 나면 scanned() 함수가 실행된다. scanned() 함수는 QR Code의 text 값을 읽어서 알림으로 띄워준다.

scan 후 확인을 누르면 다시 home 화면으로 이동한다.
6. 결과
https://github.com/hanbee1005/ionic_qrcode_scan
hanbee1005/ionic_qrcode_scan
Contribute to hanbee1005/ionic_qrcode_scan development by creating an account on GitHub.
github.com
'ionic' 카테고리의 다른 글
| ionic 개발 - HTTP 통신하기 (0) | 2020.06.02 |
|---|---|
| ionic 개발 - Local Storage 사용하기 (0) | 2020.05.27 |
| ionic 개발 - 구글 지도 API 연동 (0) | 2020.05.26 |
| ionic 개발 기초 매뉴얼 (0) | 2020.05.13 |
공지사항
최근에 올라온 글
최근에 달린 댓글
- Total
- Today
- Yesterday
링크
TAG
- CodeDeploy
- ionic
- 조합
- string
- CodeCommit
- EC2
- Dynamic Programming
- permutation
- map
- array
- 소수
- Baekjoon
- 프로그래머스
- 수학
- java
- ECR
- sort
- Combination
- programmers
- BFS
- Algorithm
- AWS
- CodePipeline
- search
- 순열
- DFS
- 에라토스테네스의 체
- cloudfront
- spring
- SWIFT
| 일 | 월 | 화 | 수 | 목 | 금 | 토 |
|---|---|---|---|---|---|---|
| 1 | 2 | 3 | 4 | 5 | 6 | 7 |
| 8 | 9 | 10 | 11 | 12 | 13 | 14 |
| 15 | 16 | 17 | 18 | 19 | 20 | 21 |
| 22 | 23 | 24 | 25 | 26 | 27 | 28 |
글 보관함
